Manual / Analyzer
Finalizer
Analyzer
The Comparison Tool
The fundamental idea of the free Analyzer is to give you the ability to compare your own music to the songs you already know and love. Therefore we’ve gone to great lengths to create a useful catalog of songs.
As a tool, the Analyzer really excels when you use it for such comparative purposes – but it is not meant as a checklist. In other words: If you compare your own music to well-known tracks, and find that they are different, it is not necessarily a bad thing.
So, how do you get started?
Before you begin uploading your own tracks, you could spend a moment to scroll through the reference track list.
In the Reference Tracks Section, there is a fold-down menu for A and for B. You will notice that the A menu is blue and the B menu is green. Apart from that, the available lists are identical.

Try scrolling through the A menu. If you stumble upon an album (or collection of songs) that you would like to know more about, click on it. The individual tracks will now appear in the box at the right side of the screen. When you select one of the individual tracks here, you access information about:

- Artist
- Album
- Duration
- Genre
- Year
And an overview of the following full-track measurements (descriptors):
- Loudness LUFS
- True-Peak dBTP
- Compression
If you just select a song list (for example an album) in the drop-down menus, but don’t select a specific song, you will see that the Compress-O-Meter and the Spectr-O-Meter show the measurements for all of the tracks simultaneously – as shown in the illustration below.

From here, you can select an individual track in three different ways: Either by choosing it in the information box or by clicking on one of the measurements in the Compress-O-Meter (numbered circles) or the Spectr-O-Meter (individual curves).
No matter which of these you choose, the result is the same: The other measurements will fade, and you only see the information for the chosen track.
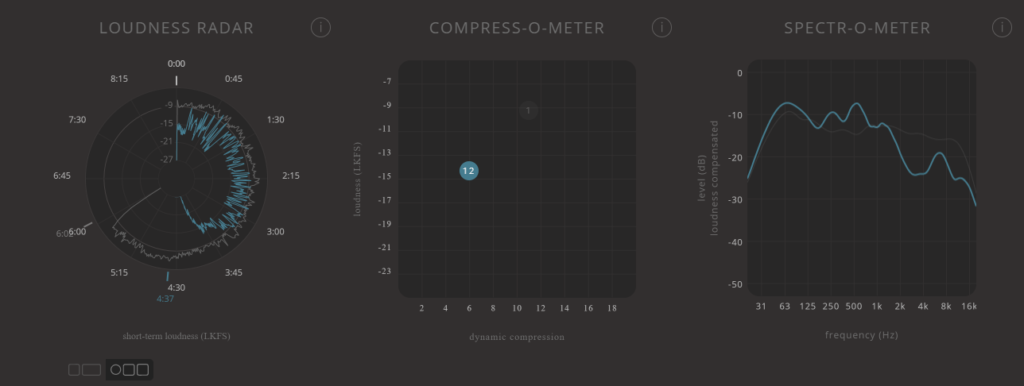
When you have found your A-track, open the B drop-down menu and select the track you want to compare it with. Remember to click on the COMPARE button positioned in the middle of the screen. Now you will see the measurements for the two tracks overlapping in all three meters – as shown in the illustration below.

But what if you want to compare a collection of songs to another collection of songs? Well, that’s possible too!
Simply select a track list in the A drop-down menu and a different one in the B drop-down menu – without selecting any individual tracks to focus on. Now you will see all the measurements for your A-tracks and the measurements for your B-tracks overlapping (see illustration below).


